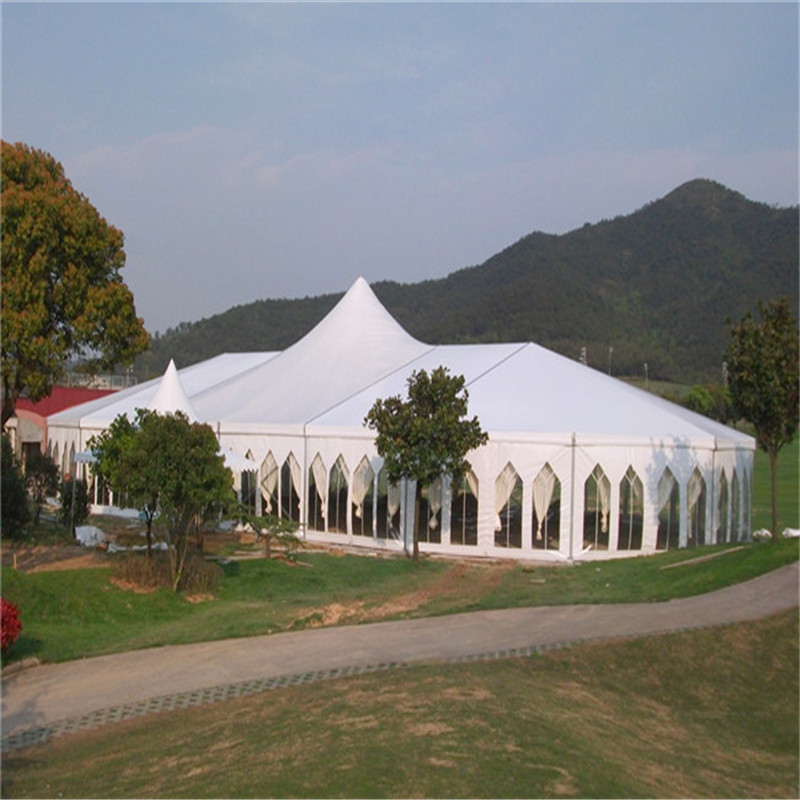
Tent is a new type of outdoor activities with temporary buildings, is an application of the canopy, storage and transportation of light, known as the "mobile real estate." It is widely used in temporary warehouses, factories, temporary construction, exhibition tents, construction tents, emergency relief. The tent is a new concept for the international community, and it is in recent years that people are gradually in the daily activities of people, it is composed of the original frame and tarpaulin, the framework of the general alloy and steel as the main components , Storage convenience, with a small size and other characteristics. Tarpaulin is a very important part of the canopy, its good or bad directly affect the safety of the Ministry of the tent, but also closely related to the safety of activities, so the choice of high-quality tarpaulin is very important. Tent design concept safe, fast and elegant. Product span from 3 meters to 60 meters, the main types are: small tent, cone roof, garden tents, party tents, holiday tents, holiday tents, wedding tents, canopy, curved canopy, arc Roof tents, steeple tents, polygonal tents, double tents, etc., at the same time tailor-made for customers of the products needed to provide creative space solutions to meet the individual needs of customers with a full range of accessories, All the accessories to increase the function and use of the canopy to meet the various needs of customers.
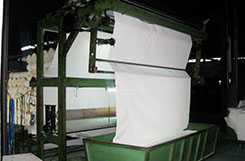
Such as transparent PVC windows with side wall cloth, all transparent tarpaulins and side wall cloth, ground anchor nails, column bearing plate, ceiling decoration cloth, tarpaulin digital inkjet, glass curtain wall, glass door, ABS hardware wall, Drainage trough, air conditioning systems and other structural support are selected high-strength aluminum alloy profiles, steel parts using hot-dip galvanized rust, tarpaulin with double-sided PVC synthetic fiber cloth, with waterproof fire to help the excellent anti-ultraviolet function. Under normal installation and fixed conditions, the wind resistance of up to eight to ten. All aspects of production are in strict accordance with the ISO international quality management system to run, all finished products are through strict quality testing and test compliance with the standard after shipping, to ensure product safety and demolition feasibility of tents and traditional buildings different Three elements:
A, safe and secure, solemn and elegant, natural resistance to a variety of harsh environments
B, superior combination of characteristics, stretching infinite space
C, easy assembly and disassembly, transport fast.

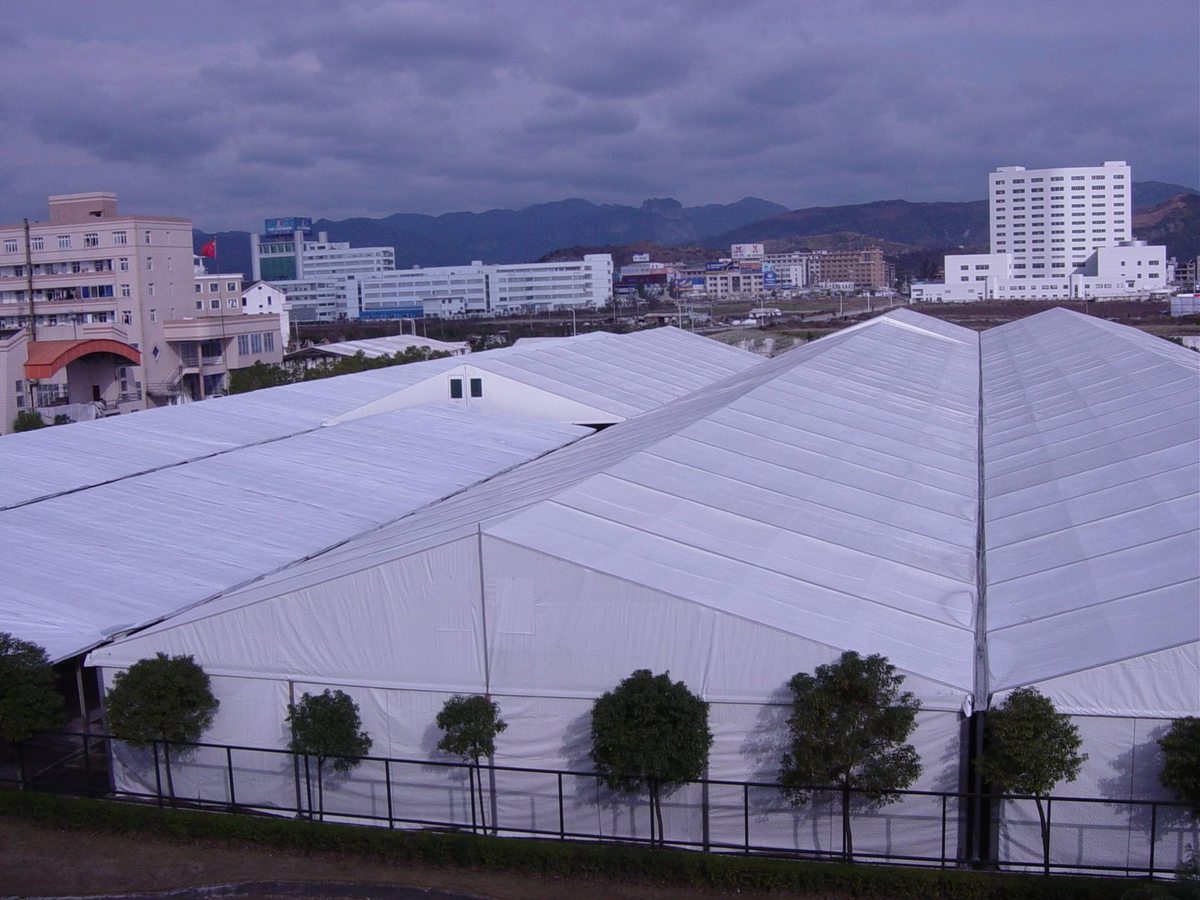
Ordinary tents are equivalent to a temporary building, safe and reliable, for different types of venues can be fast and flexible structures. There is no extra beam in the canopy, the space utilization rate of 100%, through your careful planning, the use of space more imaginative, tents to enhance the outdoor activities of a variety of possibilities to enhance the activities of the new concept The Tent in the leasing industry developed in Europe and the United States has been very popular, tents products are very mature, and has a perfect tent ancillary facilities and other supporting services, has formed a complete industry. While the canopy industry in China has just started, Peng room in the country is also a little-known concept.
Features
The span of the canopy ranges from 6 meters, 8 meters, 9 meters, 10 meters, 15 meters, 18 meters to 50 meters.
There are no special requirements for the construction of the site, generally flat as sand, grass, asphalt, cement and tiles on the ground can be.
Tent highlights
1. flexible and convenient
Easy installation and disassembly, site selection freedom, can be built in different environments.
2. safe and secure
Aluminum alloy frame, steel parts connected, PVC tarpaulin high-frequency welding, base fixed, mechanical performance super.
3. perfect service
Pre-sale, sale, sale tracking service, the first time the problem feedback, to solve.
4. Personality is satisfied
(Hardware, wall, floor, furniture, lighting, air conditioning, mobile toilet, European fence), according to the needs of the design, production personality tents, elegant appearance, and provide the appropriate facilities (hardware wall, high partition,
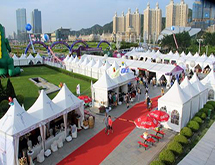
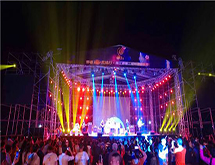
5. Applicable widely
Commercial fairs, festivals, dining and entertainment, logistics warehousing, outdoor leisure, convenience municipalities, etc., all kinds of outdoor temporary activities are useless.
Structure editing
First, the tents of the building principle for the aluminum box-shaped beam frame, the column between the support of the use of steel parts, the use of cable roof cable reinforcement, roof and wall are covered with cloth. Material selection of aluminum alloy profiles GB / T-6061 standard, by the National Nonferrous Metals Quality Supervision and Inspection Center inspection, material qualified. Tent construction is solid, the materials and structures used have high integrity and safety. The building structure meets the strict European standards. The overall structure has been tested by professional bodies for wind testing and destruction.
Second, the tarpaulin double-sided PVC coated synthetic fiber cloth, with long-lasting bonding performance; knife coating technology application of liquid PVC and fiber physical and chemical bonding, directly to the slurry coated on the fabric; solid welding Performance: After welding the fabric can withstand a lot of tension, even in hurricanes, frequent operation and other harsh environments, it will not affect the degree of sealing of the weld; durable life: a certain thickness not only to the knife-coated fabric is good Of the anti-ultraviolet performance, but also to extend the life of the product; good color fastness: the pigment directly immersed in the PVC coating inside, so the knife-coated fabric can keep the color always bright as new. Anti-corrosion, anti-ultraviolet and flame retardant (M2 and B1) and other properties are up to international standards, the use of preservation properly, then three to five years will not occur rot and mildew.
Tent has a variety of styles, according to different shapes are divided into three categories:
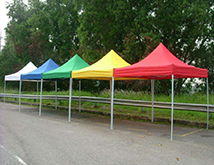
1, the first is the most common A-shaped tent. The largest use of the tent canopy is the most widely used, from outdoor business promotion to large-scale exhibition can be used.
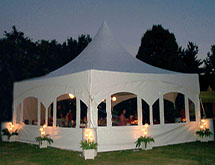
2, the second is a steeple tent. The bottom is square, and the roof is like a spire. Elegant appearance.
3, the third is a spherical tent, the dome is called "the strongest space, the lightest weight, the most effective design." The use of a rigid and robust architecture, you can temporarily hang lights and audio equipment to decorate and fill Your activity space.
4, the last kind of mixed universal A-shaped tent and steeple canopy
Installation: (before installation, customers need to prepare the tools: two people ladder, two wrenches, hemp rope two <30 meters>, 50 meters tape.
Step 1: Locate the column backplane
First determine the installation site of the ground formation, and then locate the floor, from the bottom of the floor to the center of the center of the distance of 15 meters, horizontal 5 meters, because this tutorial is 15 meters span of the tent, for example, the vertical distance of 15 meters , Horizontal is the direction of the length of the canopy, you can extend the infinity of 5 meters infinite. Note that there must be a center-to-center distance. Determine the four bottom plate position and then measure the diagonal distance is equal. Do not equal to be sure to re-adjust the position, be sure to ensure that the rectangle is not parallel to the quadrilateral. After fixing the column, fix the bottom of the column in the corresponding four positions (see Section 3: Fixed Measures for Tent). The same method will be the direction of the other side of the base set and fixed.
The second step: placed a good part of the column, angle node, inclined beam A section, inclined beam B section (note the span of more than 14 meters are required to use two skew beams), inclined beam bearing (connecting slant beam A And the sloping beam B section, 14 meters below the span of this component), the top node is arranged according to the figure, all components constitute a gable, that is, the so-called span that side chevron frame. The other mountain wall parts according to the same principle placed, pay attention to the direction must be flat on the ground.
The third step: connecting the inclined beam A / B section will be inclined beam A section into the skew beam B section of the ramp beam bearing (we will be packed when the ramp beam assembly to the sync beam B), tied to the two Of the screw (Note: that hole does not install the first screw)
Step 4: Install the top node Connect the joystick AB section to the top node, connect the screw, and tighten it. If it is the first gear, then have to install the wire cable, the steel wire and cable without one end of the buckle seat installed in the second member of the beam beam B, as shown below: tied to the screw, slightly tighten the nut, Make sure that the buckle is free to turn.
Note: wear screws to note that the screw screw is generally inside the tents, and the first gable and the second gable of the screw is relatively wear, especially the installation of steel wire rope must be relative, only So that when the gable upright when the wire can be pulled on the cable. Use this method to install all the top nodes and the sync beam AB section.
Step 5: Install the angle node
Insert the oblique end of the corner node into the section of the inclined beam A and connect the upper end of the column to the straight end of the corner node while inserting the screw and screwing the nut.
Note: If you install the wire cable and the cross bar, apply the screw on the hole above the hole end of the hole, and insert the screw at the end of the corner. The same way to install other corner nodes.
Step 6: Connect the column and the bottom plate
Align the lower insert holes on the posts against the holes in the bottom plate and tighten the nuts. The same way to connect the other pillar floor with the column. Pay attention to the entire installation process must be gently, there is a must use the wooden side of the assembled mountain wall pad, move the aluminum when the time must lift the entire frame, to avoid aluminum and the ground on the gravel and other The friction of the object causes the aluminum surface to scratch. In addition, you can install the column and the bottom plate and then install the column with the corner node, the effect is the same. After assembling all the gables, place a ladder (ladder) next to the floor on both sides of the first gable to install the crossbar with the gable, prepare the screws and wrenches and personnel, and lift the cross bar to the column Next to the stand. Installation of 15 meters span of the tent is best to have more than 12 staff with the installation, ready to work after all the steps into the vertical gable.
Step 7: vertical mountain wall
All the staff divided into four teams, two people pull the wire rope, the corner node at the station 2 individuals, others are standing at the vertex, the gable up to lift to a certain height, the middle of the staff were running to the two sides to help the gable Continue to lift up. Pull the wire rope people have to smooth the gable pull up.
When the whole gable up to 70 degrees when the time must stop, and then slowly erected perpendicular to the ground, then pull the rope of the people, while standing a little force to stabilize the top. At the same time a few people to hold the column. Install the flat iron ends of the cross bar on the lower side of the top of the column and tighten the nut. Connect the other end of the cross bar to the lower hole on the bottom of the adjacent second gable, penetrate the screw and tighten the nut. It should be noted that the floor must be fixed in advance, or pull the gable when the floor will move. Use the same method to erect the second gable and install the other two cross bars.
Step 8: Install the beams and purlins
The cross-sectional shape of the beam is in the form of a housing, and the cross-sectional shape of the purlins is square. Install the method as follows, the beam or purlin hook hook side up, and then tilt the angle of the hook end of the hook on the joint in the U-shaped ear or inclined beam on the π-shaped iron. Use a ladder to lift the hooks of the beam / purlins slowly and then hang in the opposite side of the gable or the articulated lugs. Under normal circumstances, there are three beams between the two gable, that is, one at the two ends, the middle of a top, purlins according to the size of the span increase or decrease. Hanging all the first gear all the beams and purlins, to 15 meters span, for example, need to hang three beams, four purlins. And then cross the wire to the corner of the hole to pull the first hole in the hole, and tighten, tighten the rope when the rope must be the top of the wire rope fixed to prevent the rotation of the cable when the wire rope will be followed Rotate. Use the same method to erect other gables and install beams. The middle of the mountain wall because the cable is not installed cable, so you must use the hemp rope tied to the top node to pull and stabilize the role of the gable. The beams and purlins must be installed immediately when every side of the gable is made.
Step 9: Install the support
Attach the brackets to the holes in the A section of the Skew beam and insert the screws and tighten the nuts. Installed in the support, the side beam hanging into the corner node and the support of the hanging ear. Note that when the side of the beam should be installed from the side of the side of the beam side of the installation, the first side of the side of the beam attached to the end of the hanging ear hanging in the mouth, and then slowly lift the hook side, to install the top of the hanging Ears, remember not to install the hook side, otherwise the installation is not successful. With the installation of beams and purlins, you must first install from the hook end, and then hang the hook side.
Step 10: Install the top of the cloth
Put the top of the cloth at both ends of the place with a pull into the hemp rope, pull the tent inside the tent. And then the top of the cloth on both sides of the head into the slanting beam slot, the other end of the hemp rope from the entire frame on the opposite side of the rejection, and then four people at the same time pulled the hemp rope, so that the top of the beam along the beam Slot slowly pull to the opposite. Remember to be forced to pull at the same time, otherwise the top of the cloth will be stuck and lead to move, to solve this problem only need to pull back to the top of a certain position and then re-pull at the same time, we must advance at the same time. The same way pull the other cloth top.
Step 11: Install the side triangle
With the installation of the cloth is almost the same need to use the hemp pull, but the installation side of the triangle when someone must stand (with a high ladder) next to the node next to the rope, the only difference is that the side of the triangle is pulled out. First side of the triangle into the skewer slot, and then stand in the middle of the people pulled up to the hemp rope, while standing at the corner of the node need to help lift the side of the triangle so that the tape along the trough to go up. Installation side of the triangle must pay attention to the left and right of the points, do not install anti. Pull the two side of the triangle after the middle tube from the side of the two sides of the triangle between the end of a section of the tape cut slowly wear up (in the sewn with a flat iron inside). Wear the flattened iron at the top of the node
Step 12: Install the curtain
Will open the curtain, the front (above the rope or a cover of the face) outward, first glue into the column above the milling slot where the place. And then slowly pulled up to the top of the time, the code will be inserted into the gap of the beam milling groove, pay attention to one by one into the plug, after the plug, the bottom of the curtain strip from the column of the milling And then put the curtain to the middle of the pull, and the side of the rope will be placed on the side of the canopy, the rope in turn from top to bottom together.
Step 13: Install the cloth over the bar
The top of the bar into the top of the pressure inside the bar (that is, the top two there is a double layer of the sleeve, and then put the end of the pressure bar inside the bar, and the rectangular screw into the corner of the seamless tube
Note: The middle of the two cloths are connected by a straight bar. This step can also be carried out in front of the installation curtain.
The last step is to put the curtain pressure bar (1 inch galvanized pipe) into the bottom of the curtain bar to prevent the wind blowing curtain blowing.
At this point, the entire installation process to a successful conclusion.